
For a long time I planned for the day ahead and that was all. It was enough bother, it seemed, to do it for a day. But I realized that I needed to have a heads up when something later in the week required preparation. Landing into a room full of Brownies without a meeting plan is asking for chaos. ‘Nuff said. So I started to plan my week.
The process of how I plan my week has gone through many iterations. I’ve done it in Excel, Notepad, Word, paper and more. And the latest iteration is on my iPad.
Why I Plan For The Week
The Brownies are long behind me, with my daughter being in her early 20s. But I still find that having that heads up for the coming week has saved me a lot of headaches. I now plan for the following week on Friday, and I can see what is coming at me.
I like to have an overview of my non-scheduled time. I can see if I have time to write by looking at the free evenings.
I know when I will be exercising each day: normally I schedule it for lunch time but if I am in the office then I do it when I get home. This is one of my top priorities, but if I don’t put it on the schedule it doesn’t happen.
I can also see if things have to shift around. If I have an evening appointment, I may have to adjust my standard coaching calls.
Why I Don’t Plan The Week in My Bullet Journal
I am a big fan of my bullet journal. I’ve been using it for 5+ years and have modified the method to fit the way I work. I do my daily plan in the journal faithfully every day.
But when I tried putting my weekly spread in there, I ran into some serious snags.
I will preface this by saying I have so little artistic ability that I cannot draw a straight line with a ruler. Apparently I can’t count either. So counting out boxes and drawing lines were just a recipe for disaster.
It also took a lot of time. Sectioning off the pages, then drawing the boxes, then shading things was costing me over 2 hours a week.
Being on paper, too, meant that it was unchangeable. If my work hours shifted, or a call shifted, I had the choice of trying to use correction tape or scribble over things. Either way meant a mess, and there were times that I missed things because I couldn’t read my weekly plan.
Having it in the bullet journal also meant that it was out of sight. By the time I came to the end of the week, I wasn’t flipping back pages to see what was on the weekly plan. That also meant that I missed things at the end of the week if they weren’t part of my typical schedule.
My iPad Tools for Weekly Planning
I use four tools for my weekly planning:
- GoodNotes. This is the best notebook software I have found for the iPad. It allows import of PDFs, which can then be annotated. The software is available for all platforms and is reasonably priced. It comes with built in pen, eraser, shapes and clipart (sticker) tools. It also has this great feature that makes straight lines of your drawing if you pause at the end of drawing (see “can’t draw a straight line”, above)
- Trello. I keep all of my projects in Trello. It allows me to categorize them, keep track of the state of the project, and with the “butler” I can have things automatically move when they should start.
- Google Calendar. I went back to Google after Fantastical had a spurt of unreliability. I don’t like the interface, but it gets the job done and shows me the stuff on my calendar.
- Happy Planner* I stumbled across this planner and I have been using it for 3 years. The best part about this planner is it gives you a way to completely customize a planner for GoodNotes native or PDF. And I mean everything: colors, pages, layouts, types of pages, tabs.
My planning notebook is a minimalist layout (meaning no extra tracking pages) with a purple (custom) color, white pages, for 2025 with a Monday start, rainbow 1-12 tabs, weekly pages (layout 5 of 12), no daily pages (of 8 options), and no links to Apple or Google calendars.
I cannot stress enough how much I love these planners. I have generated dozens of notebooks off of my purchases, which for $13 is an amazing price.
How I Plan
The first step in my weekly plan is to make sure that my calendar is up to date. I look at the next week and copy in what is on my auxiliary calendars to my main calendar. I also remove things that are no longer happening.
I then update Trello to move any completed projects to the Completed column and move things into the Active column as needed.
Then I go into GoodNotes and bring up the week.
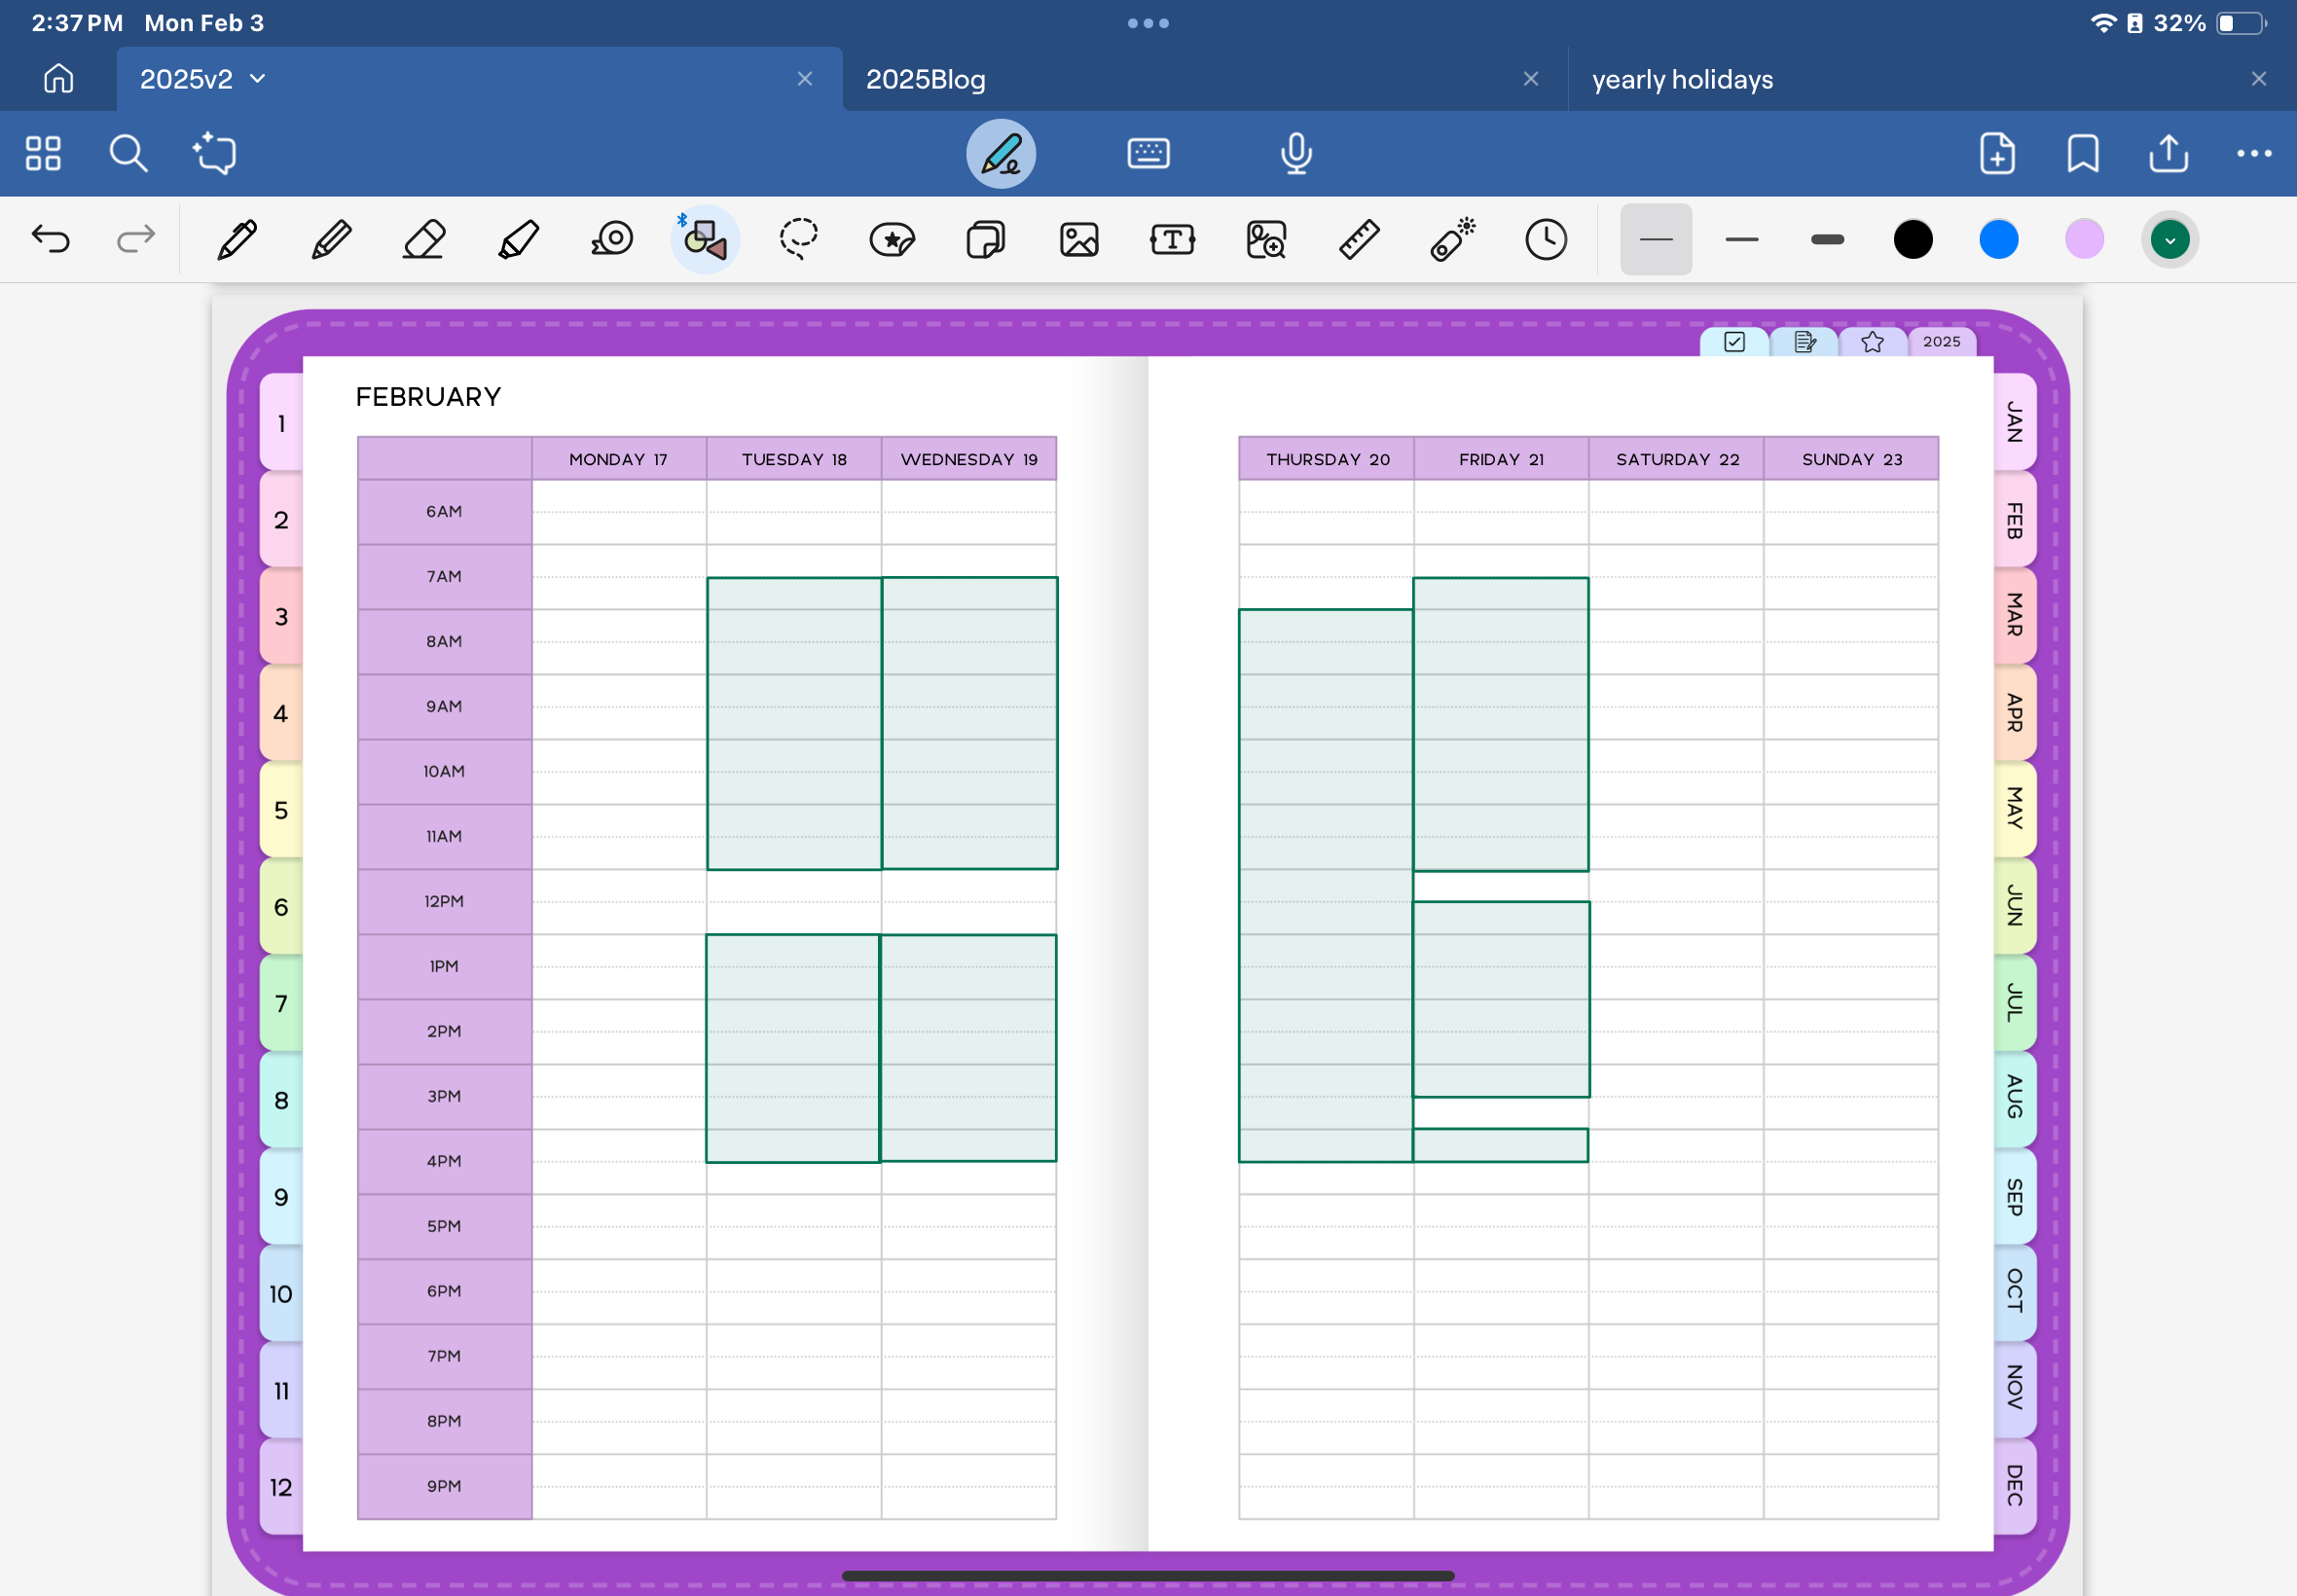
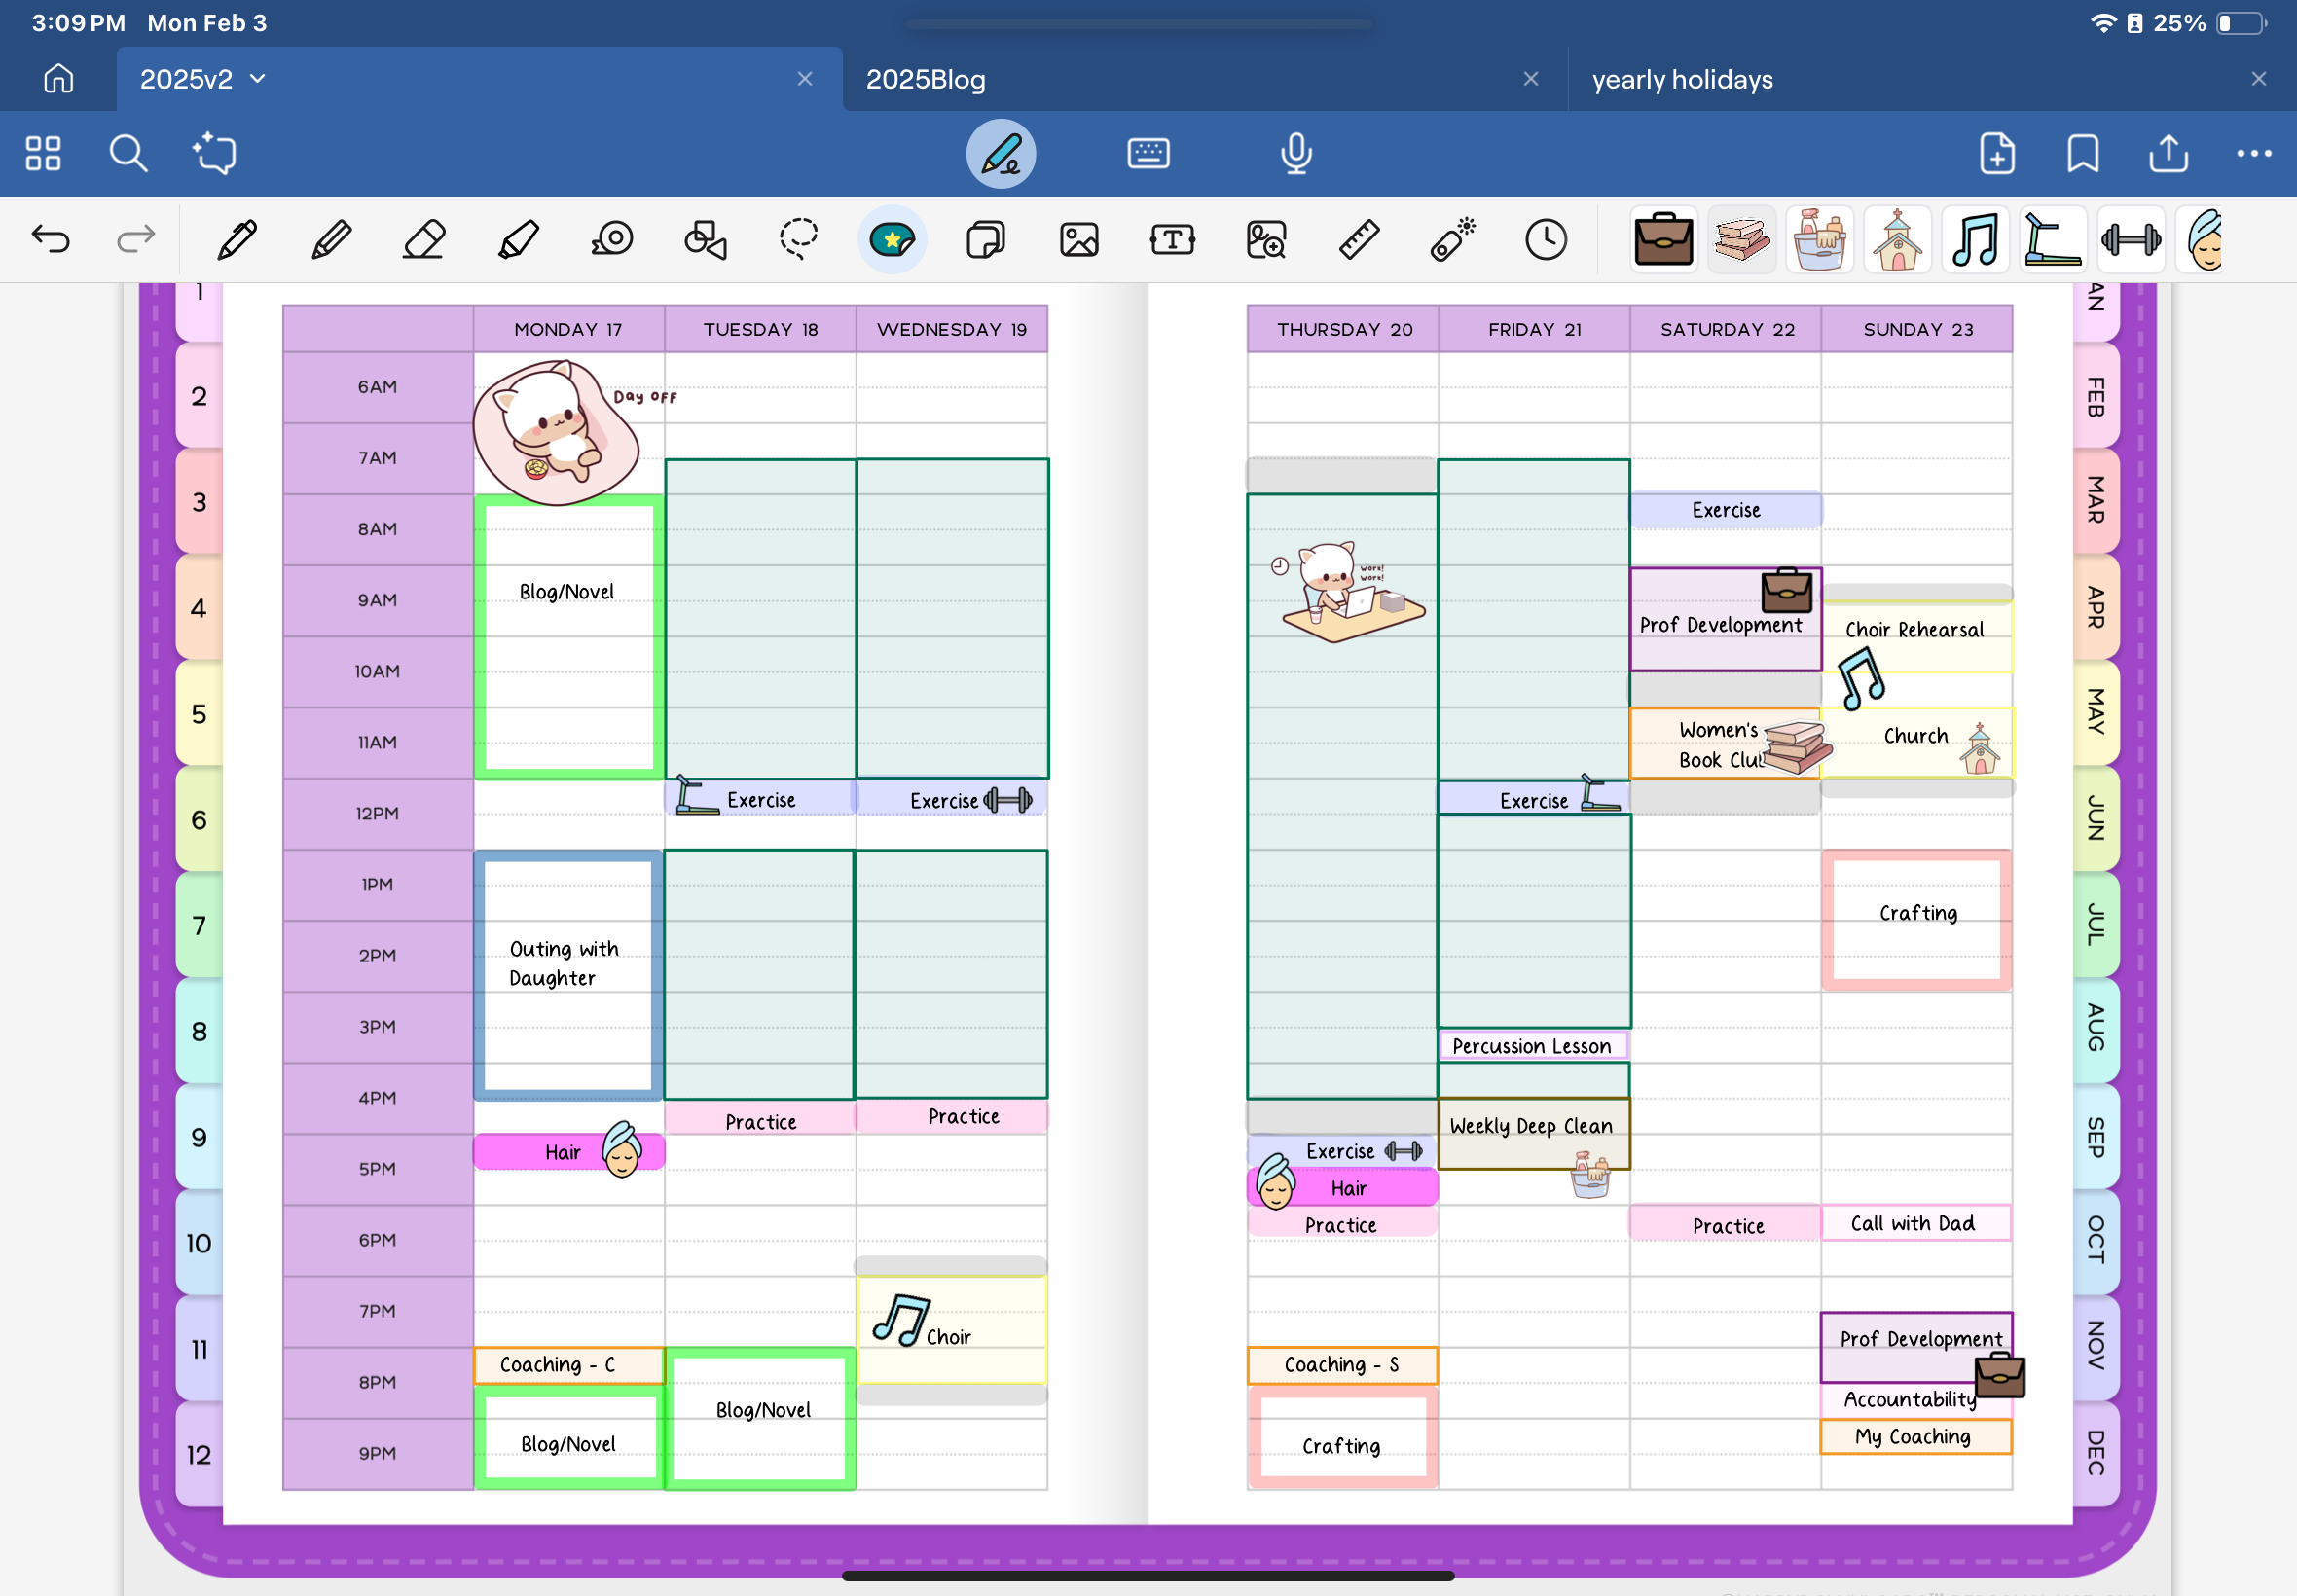
Filling in work hours
I first fill in the work hours with green boxes. My hours are pretty well set. I work from home except for Thursday. Friday hours are a bit irregular and I take the second half of my lunch break at 3:30 for a percussion lesson. This week we have a holiday, so I have left that blank.
Filling in weekly standard commitments
Next I fill in the standard weekly commitments that show up on my calendar. These include my coaching calls, choir, professional development time (which I treat as an appointment), my book club, and church. I also have my Sunday calls with my dad, my accountability partner, and my coach.
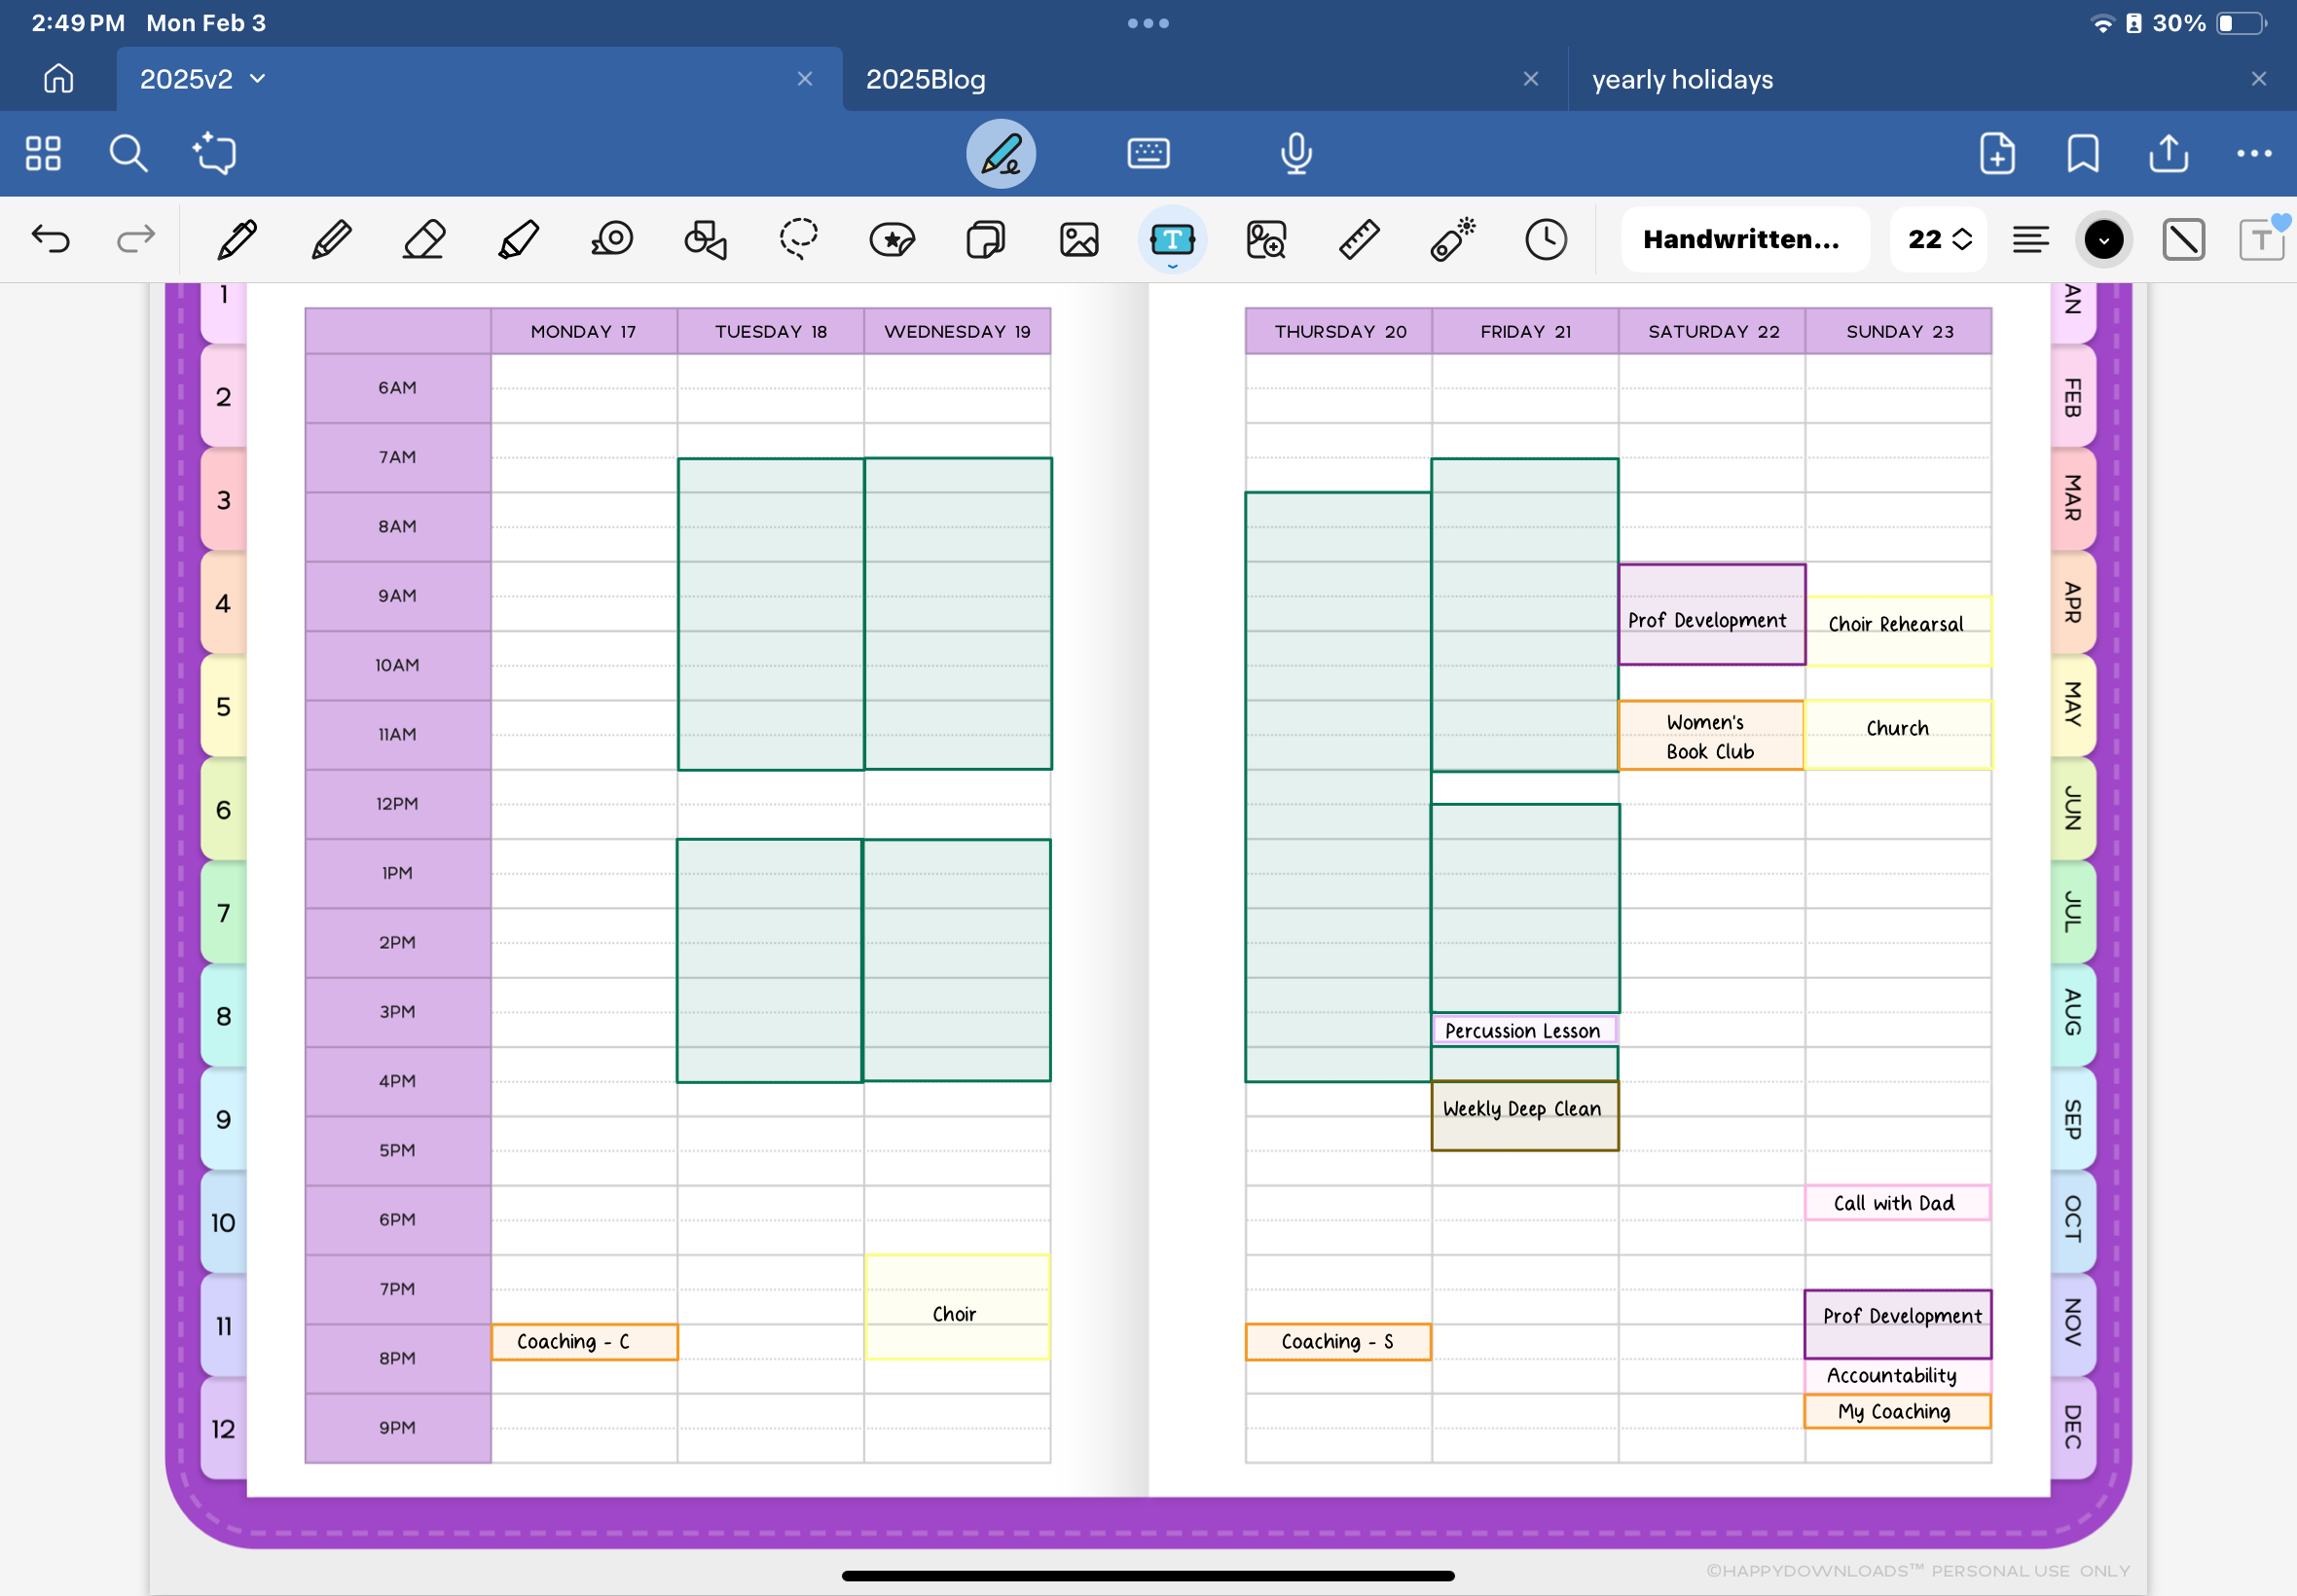
Commute, Exercise, Hair and Targets
Next I take the highlighter tool and fill in commute times (grey). I add in time for exercise, the days I have to wash my hair (because as a curly, it has to air dry to keep me from looking like Roseanne Rosannadanna).
I can then see what time is free on my schedule. Using Trello as a resource, I can block out time for projects, which I do using the highlighter and allowing the tool to make boxes. 
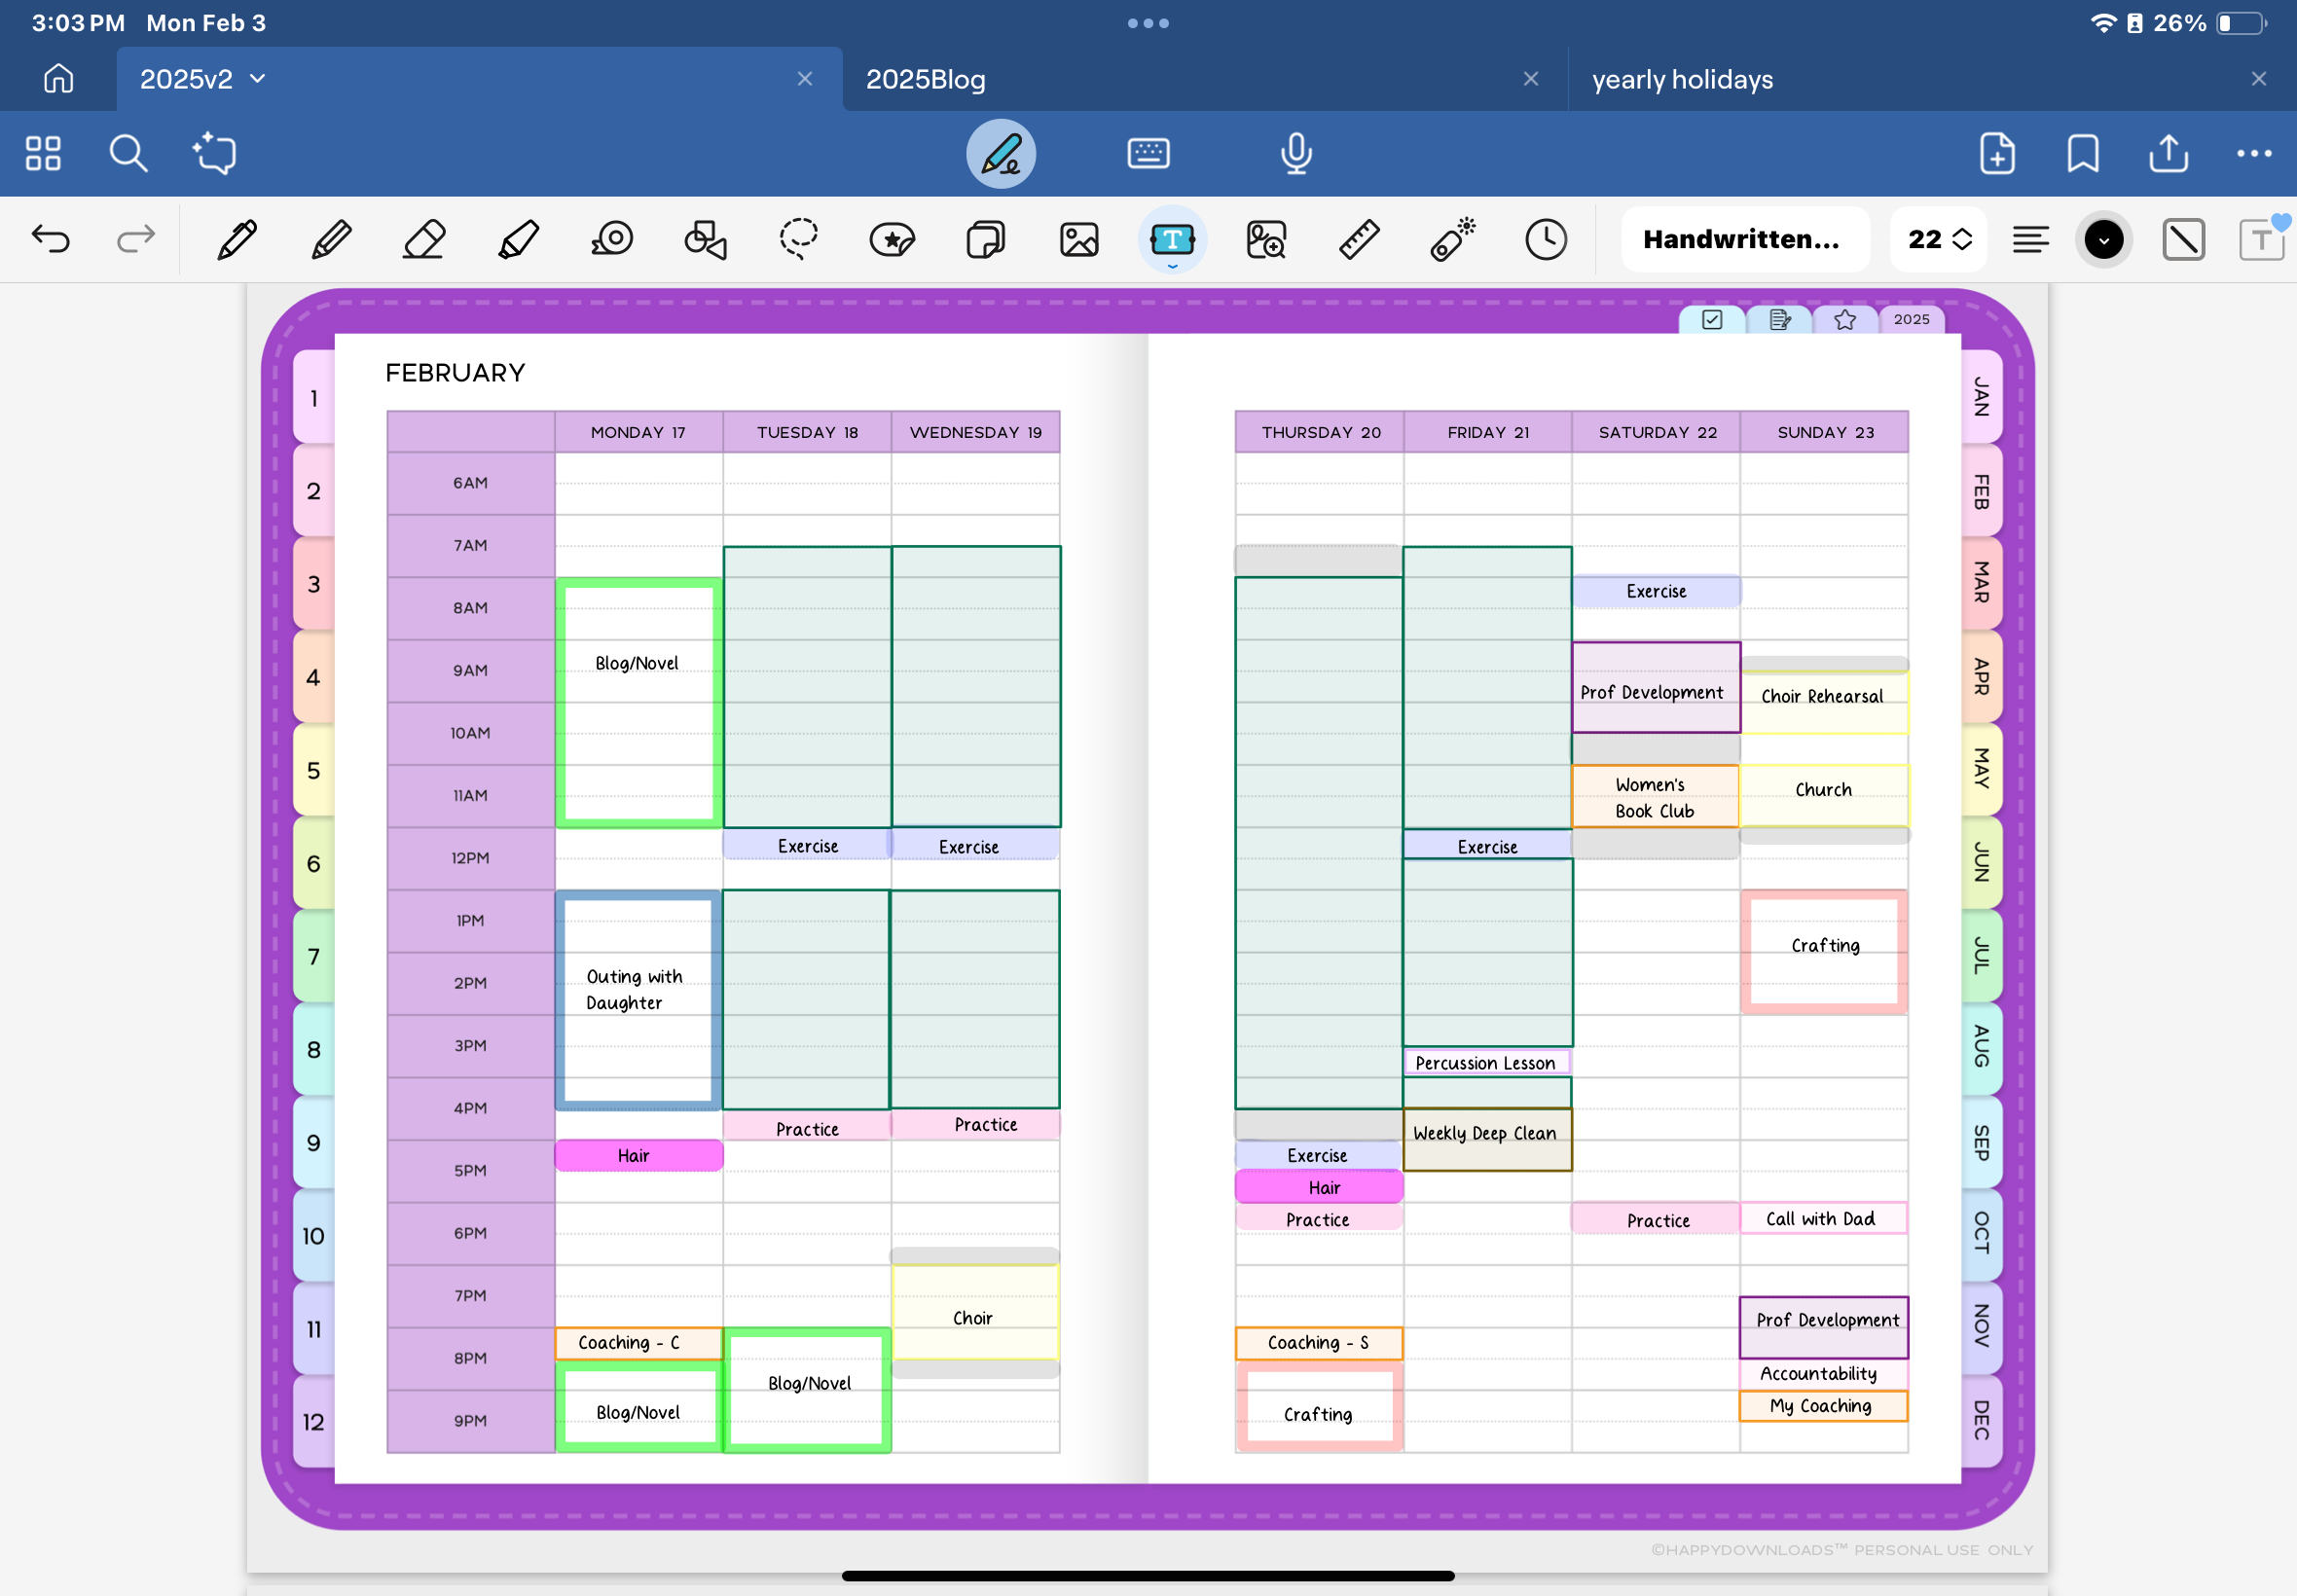
Stickers!
Next I use the clipart I have downloaded and spice up the calendar a little bit.
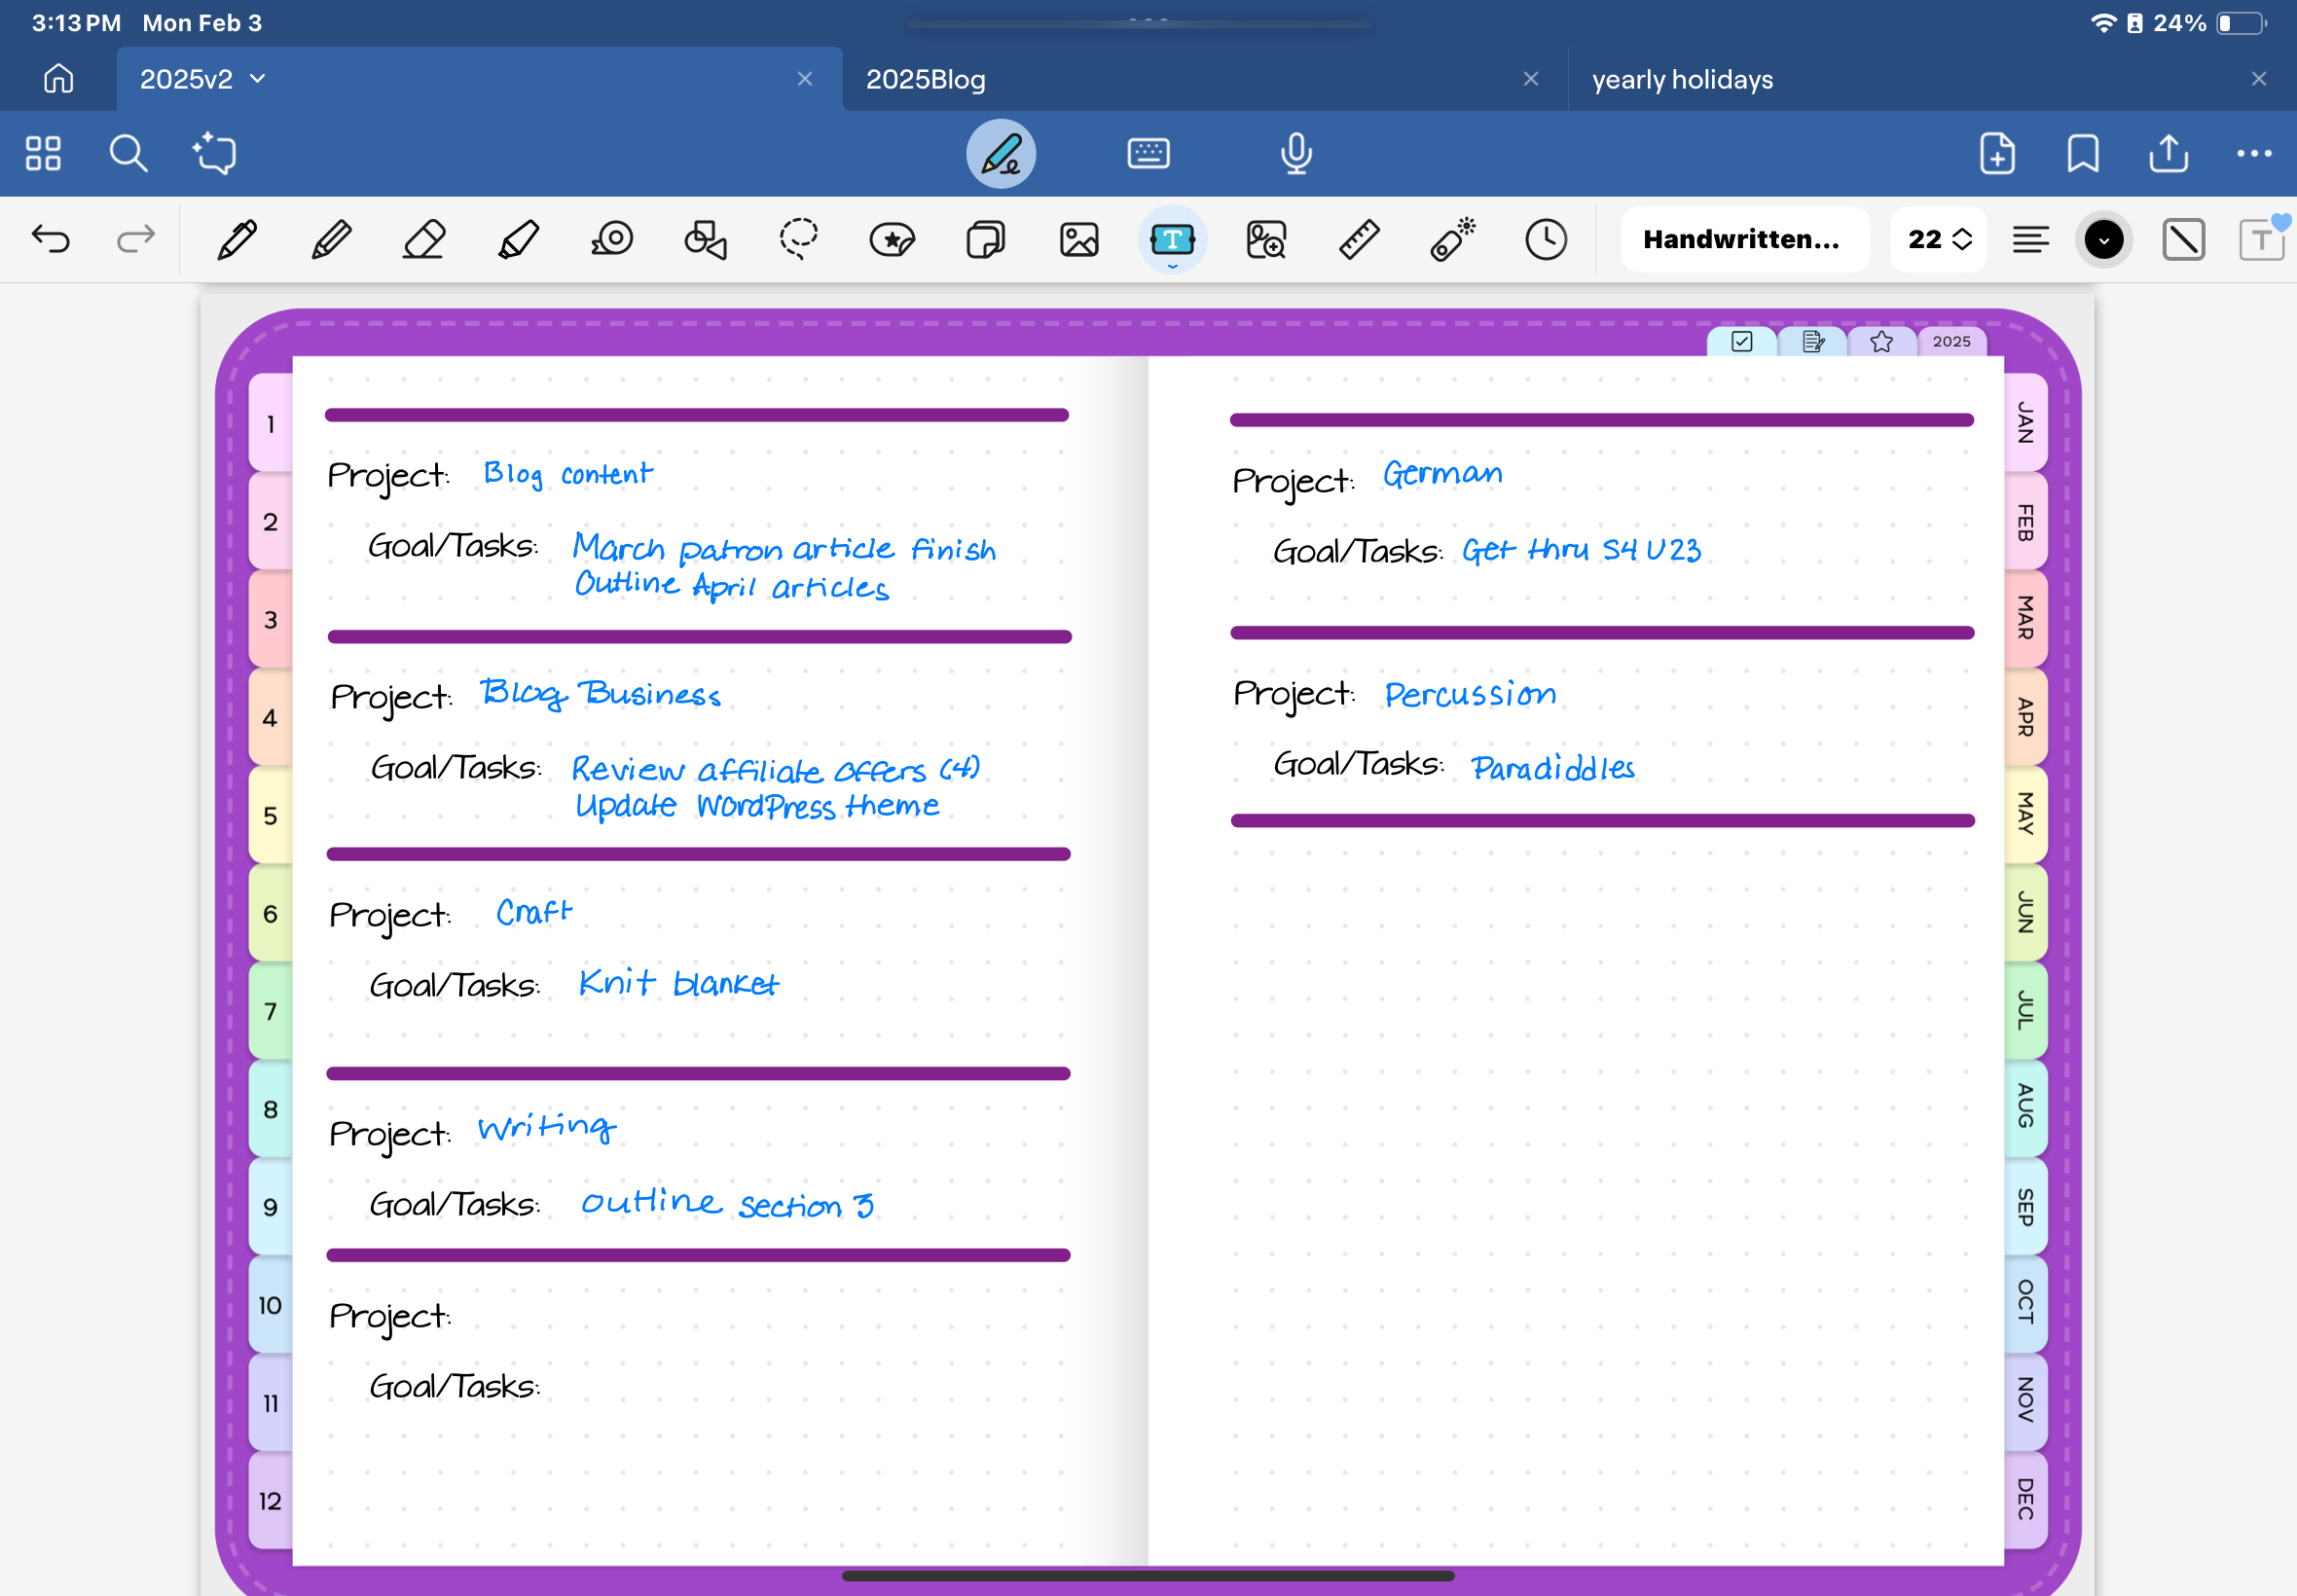
The Project Target Sheet
The next sheet is one I made myself, which has areas for listing the projects (from Trello) and what I am targeting to do in each one. This allows me to make more progress because it is spelled out. Saying “complete DuoLingo to Section 3 Unit 24” is more effective than “Do Duolingo daily”. The vague goal allows me to rationalize doing little.
Using The Plan
How do I keep up on the plan? With my daily planning on paper, I go old school. I print out both pages and put them folded in a sheet protector, which I use as a bookmark in my bullet journal. I can look at it every time I got into my bullet journal.
Planning your week doesn’t have to be complicated or time-consuming. With the right digital tools and a systematic approach, you can create a flexible, accessible weekly plan that keeps you on track without the hassle of paper-based systems. While my method using an iPad works well for me, the key is finding a planning system that fits your lifestyle and needs. The most important thing is having a system that you’ll actually use consistently to stay organized and productive throughout the week.