Bullet journaling, at its core, is a simple system with no frills. Simple text notations; no fancy graphics or headers. However, one quick search on Pinterest will show you hundreds of fantastic expansions – and complications – of the original system. It’s always put me off, because I have trouble drawing a straight line with a ruler. It put me off so much that I never really gave the simple system at its core a try.
For the past two years I have tried to plan on my iPad. I bought a PDF planner and used that as a basis, adding in a formatted page for each day. But the system wasn’t working for me, and I experienced planner blindness. Planner blindness is a fancy way of saying I started ignoring the planner. So after setting up a system (again, that didn’t work for me) for 2019 and spending a lot of time in prep, I abruptly abandoned it on Jan 2 for a paper bullet journal.
If you are a regular reader to the blog, you know that I used bullet journaling as my first 30 day challenge (see here and here). Today I present my bullet journal setup.
My Method
I have strayed very little from the traditional method. I use a plain black pen in my Bullet journal. I did add a pen loop so that the pen is always near me, because I purposefully don’t want to break the uniformity of the text.
I use the standard notations: open circle for events, a dot for tasks, and a dash for notes. This was difficult getting used to, because in past notebooks I used a squared notebook (graph paper) and drew a box. In this notebook I have chosen for the exercise, the paper is dotted and it was a shift to switch to the suggested symbols.
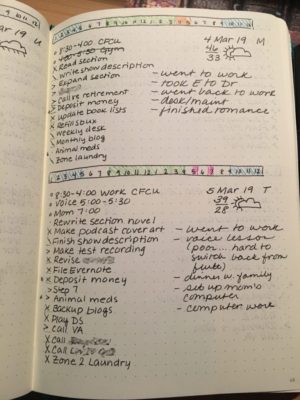
My Daily Entries
The bulk of my journal are my daily entries. Every night I sit down and write out the start of the next day. These include things on my calendar as well as the tasks.
The Timebar
It’s important to me to see the gaps in my schedule. This gives me a sense of how much time I have to work on tasks; without this I have a tendency to write too many tasks down and then I don’t get them done.
I experimented with a vertical time bar, but this didn’t work well for me. It was too clunky as I tried to write things in next to it. Instead, I settled on a horizontal time bar. This is a simple listing of the hours, and then I shade in the areas that are already spoken for. This is the only place I use color in my journal.

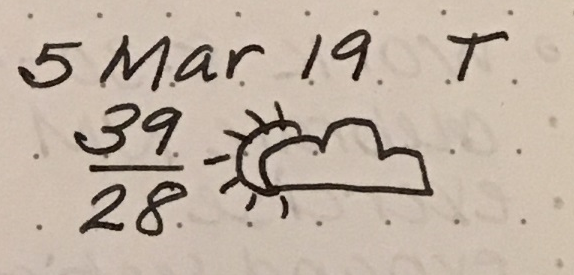
The Weather
There’s a saying in southern Virginia: if you don’t like the weather, wait an hour. Our temperatures vary all over the place. It’s important to me to know what is predicted for the next day so that I dress appropriately. I’ve been fooled too many times into thinking that because the day before was cold that today would be – and then spent the day roasting with a heavy sweater when a short-sleeved shirt would have been more appropriate.
I look at the weather each night and add a quick high/low temperature to the daily spread right under the date. I started adding a quick symbol to indicate what type of weather we had. This reminds me to grab an umbrella or sunglasses on the way out the door.
Daily Page Overall
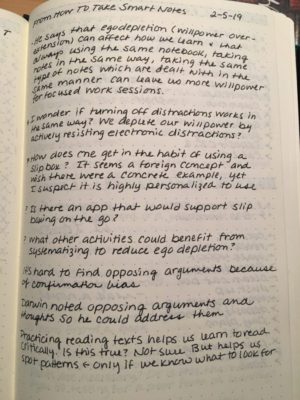
My Notes
For other pages, I simply start writing. I put a heading at the top and the day, and to from there.
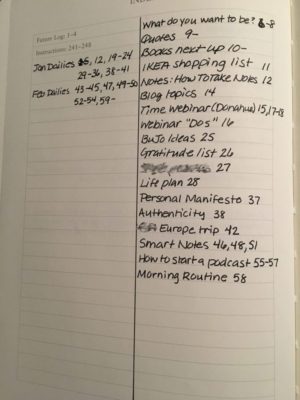
My Table of Contents
I did divide my table of contents pages in half vertically. I like to keep my daily entries separate from the note pages so that I don’t have to scan so much when I am looking for things. I do this in my work journal, and found it effective.
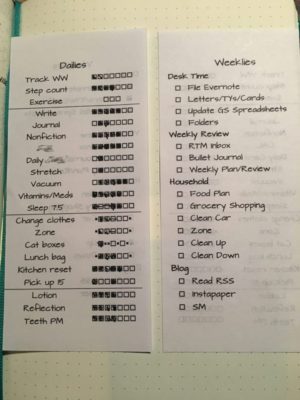
Weekly Tracking
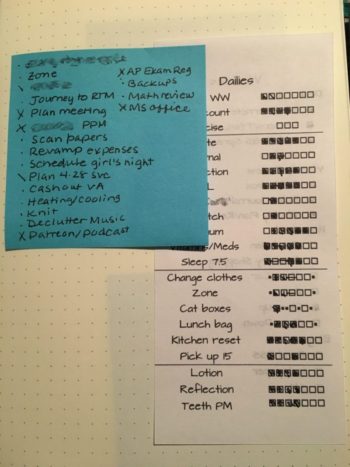
There are things I want to track that I don’t want to write down. These are the habit reminders and weekly maintenance tasks. Instead, I made a small form with boxes to color in when I did things; I hold this to the page opposite my current daily page with a sticky note.
The sticky note contains things I’d like to get done this week but haven’t scheduled to any given day. If I don’t finish the items on the sticky note, I have to do them on Sunday. So my incentive to get it all done is to have a Sunday without tasks. 🙂
Conclusion
My bullet journal is still very close to the original layout suggested. I find that it allows me to keep on track while not burdening me with too much overhead.